
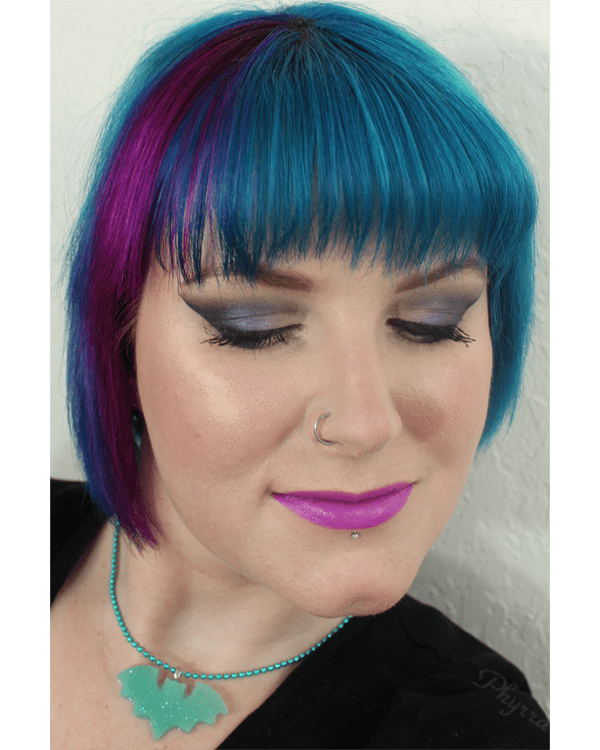
Sugarpill Starry Stinger Tutorial

Happy Friday! Today I’m happy to share with you my newest tutorial. I’ve dubbed it Sugarpill Starry Stinger. It uses Sugarpill, Silk Naturals and BFTE eyeshadows. I filmed this tutorial differently because I ended up doing a voiceover for most of it. It’s odd for me to do but I think it might flow better and faster.
PR + purchased by me.
Sugarpill Starry Stinger Tutorial
Please comment, share and subscribe 🙂
Face
- Nyx Angel Veil Primer & *Cover FX Anti-Aging Primer mixed together
- *Cover FX Matte Setting Powder in Light
- *Cover FX CC Cream in N Light & Face Atelier Zero Minus mixed together
- Nyx Solstice – blush
- *NARS Hot Sand – illuminator
Lips
- Nyx Nude Lip Primer
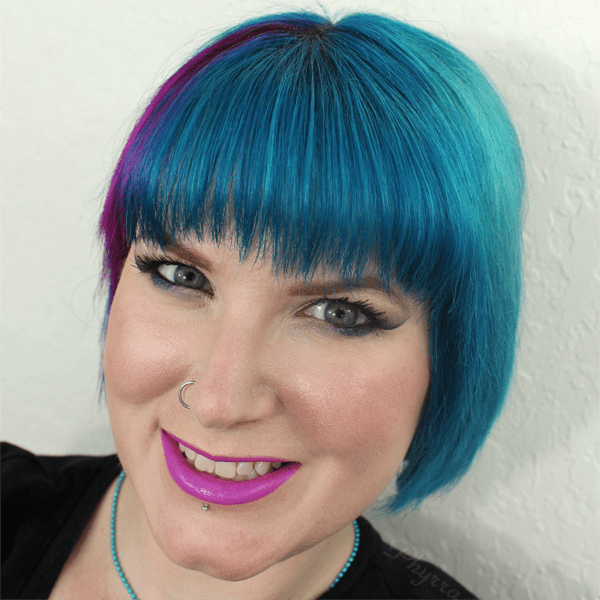
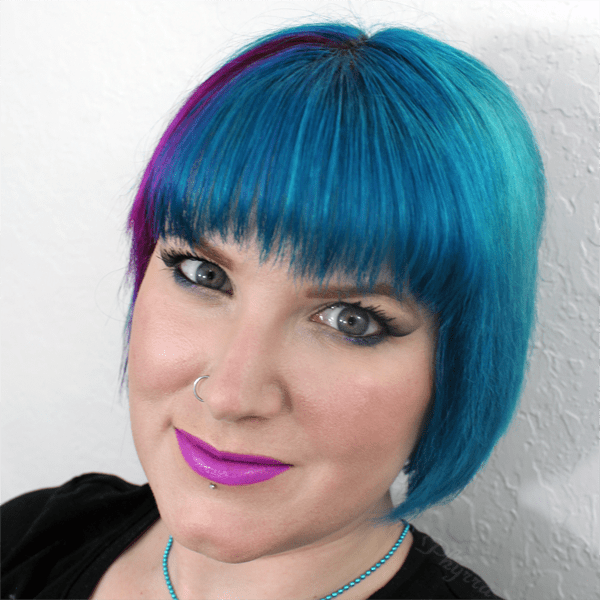
- *Too Faced Melted Lipstick in Melted Violet
Eyes
- *Cover FX Anti-Age Smoothing Primer
- *BFTE Foam On Top – base shade and inner lid
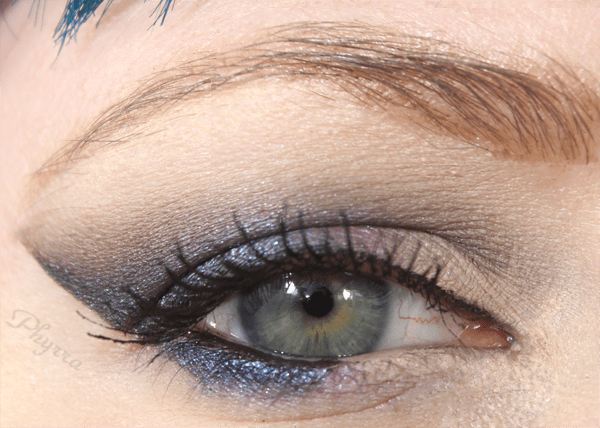
- Sugarpill Soot & Stars – cat eye shape and outer lower lid
- *Silk Naturals Drive – to blend with Soot & Stars
- *Silk Naturals Stinger – middle lid blended outwards, lower middle lid blended outwards
- NARS Via Veneto – upper lash line
- NARS Black Valley Eye Paint – to tightline and upper lash line, outer lower waterline
- Glo Minerals Peach Liner – inner lower waterline
- Ardency Inn Punker Unrivaled Volume & Curl Mascara
- Tarte Lights Camera Flashes
- Tarte Brow Architect in Fair
Brushes used
- *Makeup Geek Rounded Blush brush
- *Makeup Geek Cheek Highlighter brush
- *Makeup Geek Pencil brush
- Makeup Geek Crease brush
- *Cover FX Powder brush
- *Cover FX Liquid foundation brush
- Goss 5 brush
- Goss 17 brush
- Goss 8 brush
- Sigma E35 brush
- Wet n’ Wild Eyeshadow brush
*PR sample
I tried to show which brush and product I used together in the video so that you could see my application technique and blending. Some of the Makeup Geek brushes are new to me and they’re really nice. I’ll be reviewing them. The 2 that I already own that I purchased quite some time ago – the crease brush and the smokey eye brush – are awesome, must have brushes. I really like the pencil brush and cheek highlighter brush. I’m still getting the hang of the rounded blush brush but what I really like about that one is that it fits into some of my smallest blush containers.
I still have not found another brush that has the right size and shape as the Goss 8 brush. It makes it so easy to line along my upper lash line and upper waterline, where most brushes are too big, too wide, and too bulky. The Goss 5 brush is indispensable for its ability to blend out any weird / harsh edges without taking away color.
I tried layering mascaras and unfortunately the combo I used ended up with flaking on my cheeks. No good!
I should have used Fyrinnae Pixie Epoxy to make Stinger really pop. However, I love how it looked blended on top of Soot & Stars on the outer lower lid.
Overall, I’m thrilled with how this tutorial turned out and I’m happy to share it with you. I hope you love it as much as I do!
Got any requests? Let me know below!
This is such a gorgeous look. I love the subtle pop of color.
I love how subtle, yet colorful this is!!
This is so pretty Phyrra!
This is such a beautiful look!!! I love the duochromed aspect. Stunning look!
Love that stingray edge!
this is a beautiful eye look!
Beautiful colors! Love the whole look!
Love those colors!
I like the sharp yet subtle edge of your eye makeup. I know you understand what I exactly mean. One word: fabulous!
Gorgeous! 😀 Also, you have purple lipstick on, which is always an occasion for a *happydance*.
<3 thank you!
I love it !
Thank you Betzy!
I like the super crisp line you got with your eye makeup!
It’s all because of the tape!
OMG one of your best looks ever. I loved it all. Fierce honey!
Thank you Ashley! I think so too!
Love. love, love this look!
Thanks Cindy 🙂
That is some beautiful blending work!
Thank you Kimmi!
I love love love the cat eye. You look just beautiful. One of my favorite looks.
Thank you so much Marcia! *hug*
looks great. I love purply shades!
Thanks Laura 🙂
Great look! And it elongates your lashes.
Thank you!
Gorgeous look and tutorial and I love them lips! 😀
Yay thank you Honey <3
Absolutely stunning!
Thanks Noelle!
Beautiful look and great tutorial!
Thank you Eugenia!
Stunning. Simply stunning.
Thank you Erika!
I love how this whole makeup perfectly coordinates with your hair!
I need to try it with blues and pinks too!
Gorgeous, Gorgeous, Gorgeous!
Thanks Aleya!
I love that look on you, really nice and a great tutorial! Thank you!
So happy to hear, thanks Michelle!
Very very pretty look and great tutorial!
Thank you 🙂
This is such a pretty look!
Thank you Sheila!
This is pretty! I love the lip color too
Yay Thanks Kim!
What a great tutorial! I love how you used the tape. It looked very severe at first, but then I really liked how it totally camouflaged your hooded eyes. My eyes are getting more hooded and I can never seem to get a nice wing – maybe I’ll try tape, too!
Yes, give tape a try! Just be sure to de-sticky it more first.
Love that shadow wing!
Thanks Allison!
I like the voice over, it really makes a difference and sounds great. You have a lovely voice
BTW nice tutorial. The tape is a good method to get that flick 🙂
Thank you! I’ve only done voice overs once or twice so I’m still not very comfortable with them. The tape is awesome 🙂
Absolutely stunning!!! The shades look amazing with your hair and that lip shade. OMG simply gorgeous. Great job girl!!!
Thank you so much Jamie!
Absolutely beautiful job!! So love! Hope you will come and give me your opinion on which palette I should use for my next eye look on my blog post. I am taking a poll on my blog post today!
Thank you Beth!
perfect wings!!
It was all due to the tape 🙂